
What is the look of your first paint by numbers? It looks good, but you might still see the edges feel a bit like a coloring book. After painting more works, the trend has shifted from "just finishing" to "mastering the craft."
If you're also wondering how to make paint by numbers look better, you don’t need a fine arts degree—you just need a few "pro" secrets. Here is how to transform a hobby kit into a masterpiece.
1. The Secret Foundation: Using Gesso
Most kits come with a pre-printed canvas, but if you want a professional surface, applying gesso for paint by numbers is a game-changer.
- Why it works: A clear, matte gesso adds "tooth" to the canvas, helping the paint grip better and preventing it from soaking into the fabric.
- Pro Tip: Use a transparent gesso so you can still see your numbers while enjoying a much smoother application.
2. Master the Art of "The Blur"
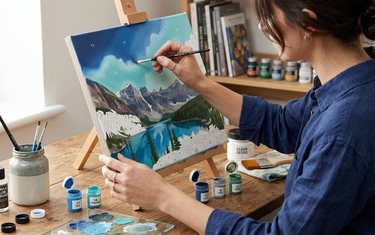
The biggest giveaway of a paint by number is the "patchy" look. To fix this, you need to start blending paint by numbers acrylics.
- The Technique: While two adjacent colors are still wet, use a clean, slightly damp brush to gently "zig-zag" across the line where they meet.
- Where to use it: This is essential for skies, water, and skin tones. It softens the hard edges and creates a realistic gradient that fools the eye into seeing a custom painting.
3. Invest in Professional Paint by Numbers Tools
The brushes included in most standard kits are "starter" quality. If you are serious about your results, upgrading to professional paint by numbers tools is the single fastest way to improve.
- Detail Brushes: Look for synthetic "Spotter" or "Liner" brushes (sizes 000 or 10/0).
- Flow Improver: If your paint feels "gloopy," don't just use water. A drop of professional acrylic flow medium will make the paint glide like silk without losing its color intensity.
4. Advanced Paint by Numbers Techniques: Layering & Zig-Zagging
To move into advanced paint by numbers techniques, stop thinking of the numbers as "boundaries" and start thinking of them as "guides."
- Double-Coating: Light colors (whites, yellows, pinks) almost always need two coats. Paint the first layer, let it dry, and then go over it again to completely hide the printed numbers.
- Zig-Zag Edges: Instead of a flat line, use tiny "flicks" of the brush to create texture, especially in trees or fur. This breaks up the mechanical look of the kit.
5. Correcting "The Ghost Number"
Nothing ruins a painting like a "14" peeking through your beautiful sunset.
- The Fix: Use a white acrylic marker or a tiny dab of white paint to cover the number before you put the actual color on top. This creates an opaque base that ensures your final color pops without any "ghosting.
Comparison of Beginner vs. Advanced Finish
|
Feature |
Beginner Method |
Advanced Method |
|
Edge Detail |
Hard, visible lines |
Blended gradients |
|
Paint Texture |
Single thin layer |
Multi-layered / Impasto |
|
Number Visibility |
Often visible through light ink |
Fully concealed with white base |
|
Canvas Prep |
Out of the box |
Primed with Clear Gesso |
By moving beyond the basic instructions, you turn a structured activity into a true creative outlet.

