
5 Expert Secrets for a Better Diamond Painting
So, you’ve finished your first few projects and you’re officially addicted. But look closer—are your lines a little crooked? Is there a bit of dust stuck to the adhesive? If you want to transform your work from a "craft project" into a professional-grade masterpiece, it’s time to upgrade your technique.
1. Switch to Square Drills for a Seamless Finish
While round drills are great for beginners, most experts prefer a square diamond painting. Why? Because square drills fit together perfectly with zero gaps. This creates a "mosaic" effect that looks much more professional and detailed from a distance. Plus, you get that incredibly satisfying "click" or "snap" sound when a square drill fits into its place!
2. Illuminate Your Workspace with a Light Pad
If you find yourself squinting at tiny symbols or making mistakes in dark-colored areas, a diamond painting light pad is a total game-changer. This ultra-thin LED board sits under your canvas, shining light through the fabric to make every symbol pop. It’s the single best way to ensure perfect alignment and reduce eye strain during those late-night "just one more row" sessions.
3. Level Up Your Diamond Painting Tools
Stop using the basic pink pen that came in the box! To work faster and with more precision, you need professional diamond painting tools. Consider these upgrades:
- Multi-placers: These allow you to pick up 3, 6, or even 10 diamonds at once—perfect for large sections of the same color (known as "color blocking").
- Stainless Steel Tips: Unlike plastic tips, these don't wear down and provide a much steadier grip.
- Anti-Static Tweezers: Essential for picking up "stray" drills or making micro-adjustments to square drills.
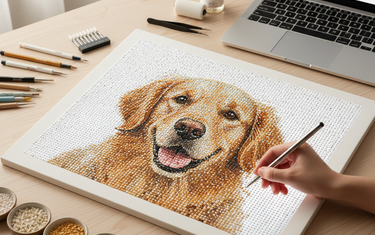
4. Personalize with a Custom Diamond Painting
Once you’ve mastered the technique, stock designs can start to feel a bit repetitive. A custom diamond painting allows you to turn your own photography—a wedding photo, a pet portrait, or a vacation memory—into a sparkling artwork.
- Pro Tip: For custom projects, always choose a larger size. The more diamonds your image has, the more detail and realism you’ll achieve in the final result.
5. Protect Your Masterpiece with a Sealer
There is nothing more frustrating than finishing a 40-hour project only to have a diamond "pop" off a month later. Applying a high-quality diamond painting sealer once you’re finished is the secret to longevity. A good sealer fills the tiny gaps between drills, locks them to the adhesive, and adds an extra layer of UV-resistant shine. It ensures your art stays as sparkly years later as it does today.
Ready to upgrade your craft station?
Better results come from better habits. Start by sectioning off your canvas with washi tape and working in small squares to keep the glue fresh and the lines straight.

